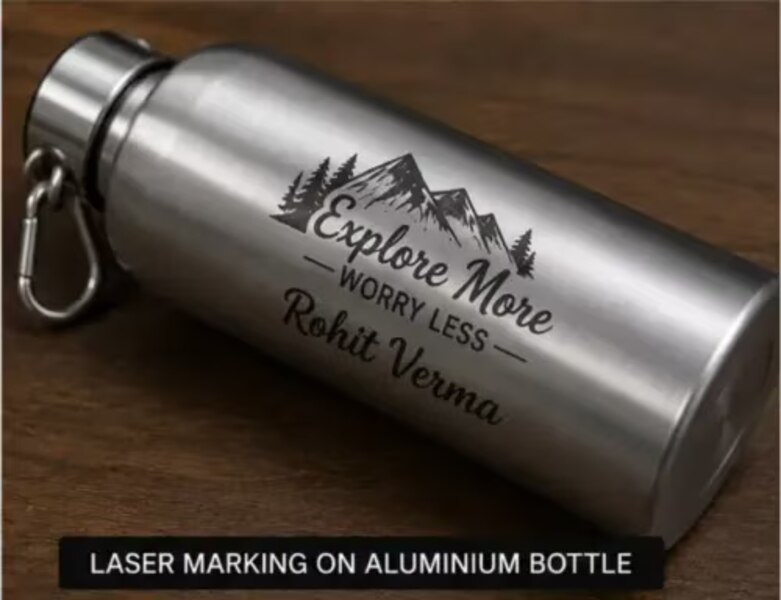
A bottle logo can look sharp on screen yet distort, lose contrast or become unreadable once it reaches a curved, coated aluminium surface. By following the workflow from artwork and surface selection through rotary setup, marking, inspection and dispatch, you can specify a finish that suits the bottle, its use and its production volume.
Key takeaways
- Approve the alloy, coating, dimensions and mark appearance before production.
- Measure bottle diameter, taper, seams and printable area before mapping artwork.
- Match laser settings to anodised, painted, coated, brushed, polished or bare aluminium.
- Inspect logo position, contrast, depth, cleanliness and batch consistency before dispatch.
Start with the Bottle Surface and Production Artwork
Approve the bottle’s surface stack and production artwork together before processing: alloy, anodised, painted, powder-coated, brushed, polished or bare finish; diameter, taper, seams and printable area; finished logo width and height; orientation; and required mark colour or depth.
| Surface | Marking plan | Main risk |
|---|---|---|
| Anodised | Remove the coloured layer to expose contrasting aluminium | Uneven colour if coating thickness varies |
| Painted or powder-coated | Ablate the coating or mark its surface | Haloing, residue or weak adhesion at edges |
| Brushed | Align the artwork with the grain or deliberately cross it | Streaks make thin lines disappear |
| Polished | Control reflection and focus carefully | Glare reduces contrast |
| Bare aluminium | Use annealing, darkening or shallow engraving | A light surface mark may remain unreadable |
Supply clean vector artwork in AI, EPS, SVG or DXF format, convert fonts to outlines, and specify:
- Finished logo dimensions, minimum stroke width, text height and QR-code module size
- A dark-light QR contrast target and a clear quiet zone of at least four modules on every side
- Bottle diameter, taper, axial position and wrap angle for curved artwork
A traced raster image is not reliable linework: automatic tracing can create gaps, doubled edges and distorted letterforms. Map the logo to the bottle’s developed surface, then check its curvature, rather than stretching a flat image by eye.
The proof must show the actual bottle outline, clock position, dimensions, readable text, QR quiet zones, seam exclusions and the approved surface result. That proof is the reference for aluminium bottle logo marking in Noida.
Map the Mark onto a Curved Bottle
A level, repeatable logo starts with bottle geometry, not the flat artwork file. Measure the diameter and taper, then map the design to the circumference before programming the laser.
A rotary attachment synchronises bottle rotation with the laser path, preserving logo proportions as the surface turns. The jig sets the axial position and limits radial wobble; otherwise focus drift makes one side sharper or lighter, circles become elliptical, and text spacing changes.
The production drawing must specify:
- Clock position, axial datum, finished mark size, wrap angle and exclusion zones.
- The usable area after accounting for seams, welds, dents, base rings, handles, shoulder curvature, threads, lids and embossed graduations.
- Cap removal or cap geometry, plus the position of any assembled component that could block the beam or alter the reference position.
A cylindrical wall gives a consistent mapping; a tapered bottle needs changing scale or a reduced wrap angle to keep the logo level. Fine text exposes small focus errors first because the laser spot and effective line width grow as the surface leaves the focal plane.
Test the fixture with the actual bottle. A loose neck, uneven base or dent can shift the mark during rotation, so record axial and radial tolerances and reject any design that crosses a seam, weld, handle or exclusion zone.
Choose the Marking Method and Surface Finish
Request the physical result, not merely “laser marking”: surface marking, deeper engraving or high-contrast annealing. Machine choice follows that result. A fibre laser around 1,064 nm handles direct metal work and coating changes; a CO2 laser suits selected non-metallic or anodised coatings.
| Result | Physical effect | Suitable laser and trade-off |
|---|---|---|
| Surface marking | Shallow coating removal exposes bright aluminium with little tactile depth; residue or haloing appears if energy is excessive. | Fibre for many coatings; CO2 for suitable non-metallic or anodised coatings. |
| Deeper engraving | Metal ablation creates a measurable depression, tactile edges and stronger dirt retention. | Fibre; confirm cleanability and coating protection. |
| High-contrast annealing | Darkens reflective bare aluminium without removing much metal. | Fibre with a controlled recipe; contrast can fade or vary with finish. |
On anodised bottles, repeated passes can cut through the anodic layer and create a grey, uneven mark instead of higher contrast. Exposed aluminium changes the approved corrosion-protection system, so obtain the bottle supplier’s cleaning guidance and validate abrasion, chemicals and dishwashing.
Ask a custom bottle laser engraving service for same-finish test coupons before release. Vary power, speed, pulse frequency, hatch spacing, focus and pass count, then approve depth, colour, tactile feel, residue and haloing under production lighting.
Run, Clean and Inspect the Production Batch
After proof approval, record the approved sample, artwork revision, machine and lens identification, rotary setup, parameter set, position tolerance, appearance standard and inspection quantity. Use empty, dry bottles; remove caps and contents, and protect liners, valves and other internal components. Ventilate smoke at the laser head.
- Allow fixture setup and first-piece approval before counting production time; per-piece marking time excludes loading, unloading and cleaning.
- Mixed designs reduce throughput because each artwork, serial-number rule and parameter set needs a changeover and verification.
- Clean smoke, redeposited coating, oil and fingerprints with the bottle maker’s coating-compatible cleaner, then use a lint-free or white-glove inspection.
- Keep marks clean and dry before packing; residue can fill shallow engraving and make contrast look cloudy.
Inspect under consistent lighting and the same viewing angle. Reject missing strokes, distorted logos, wrong serial numbers, unreadable fonts, marks outside the drawing’s positional tolerance, loose coating, or inconsistent contrast. Test a QR code or Data Matrix with a smartphone at the approved distance, then use a formal verifier for grade, decodability and data accuracy.
| Laser marks | Permanent, limited colour; coating removal or exposed metal needs abrasion, chemical, dishwasher and outdoor validation. |
|---|---|
| Ink | Colourful and fast, but removable or washable; requires curing and chemical testing. |
| Labels | Full colour and replaceable; edges, adhesive failure and outdoor exposure remain risks. |
| Screen or pad printing | Strong colour coverage; needs ink curing, registration control and possible protective overcoat. |
A protective coating improves durability but can soften contrast or obscure texture; approve it with the final cleaning and exposure tests.
Specify the Job Before Sending Bottles to a Noida Provider
A quotation request must describe the bottle and the result, not just say “add our logo.” For aluminium bottle laser marking for process in Noida, send the latest artwork and state whether you need coating removal, surface contrast or measurable engraving depth.
1. Specify the alloy, bare or coated finish, bottle diameter, taper, printable area, quantity, artwork revision, finished logo size, location, orientation, required colour or depth, and whether the bottle is empty, capped or otherwise assembled.
2. Define serial-number rules, QR data format and quiet-zone protection, packaging requirements, sample-bottle availability, and acceptance tests for position, legibility, scan distance, abrasion, chemicals and dishwashing. State the allowed position tolerance and inspection quantity.
3. Before dispatch, approve a sample and record the machine and lens identification, rotary setup, focus, power, speed, hatch and pass parameters. Confirm who loads, counts, protects, stores and returns stock; a wrong assumption can cause scratches, mixed serials or missing pieces.
An aluminium bottle branding manufacturer may source bottles, fill them, pack them and deliver a finished branded product. A job-work provider marks customer-supplied stock, so you retain responsibility for bottle compatibility and transport damage.
Laser Job Services can be assessed against this same record rather than a verbal promise. Choose another process, or qualify it first, for full-colour graphics, very large wraparound artwork, flexible or heat-sensitive parts, or marks required to survive an unvalidated chemical or abrasion test.
Related product
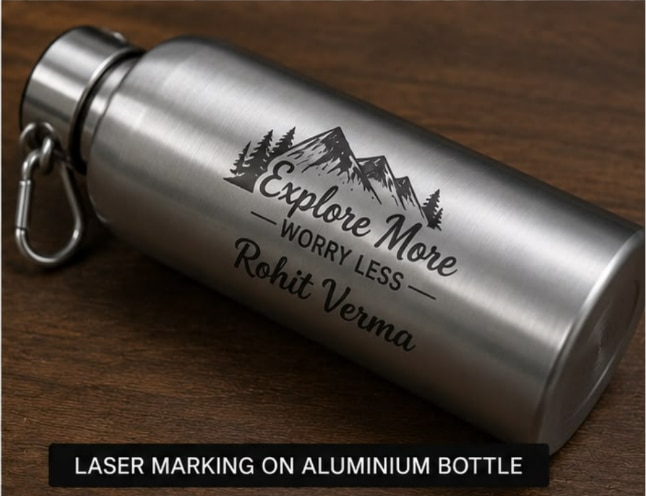 | Stainless Steel Logo Engraving, Metal Card QR Code Marking Aluminium Bottle Laser Marking Laser Job Services provides precision laser marking, engraving and customised branding services for aluminium bottles and other compatible metal... View product → |
Frequently asked questions
What bottle details must be approved before aluminium laser marking?
Approve the alloy, surface finish, bottle diameter, taper, seams, printable area, logo dimensions, orientation and required mark colour or depth.
How is a logo mapped onto a curved aluminium bottle?
The provider uses the bottle diameter, taper and printable area to position and size the artwork so the logo follows the curved surface accurately.
Which surface finishes affect aluminium bottle laser marking?
Anodised, painted, powder-coated, brushed, polished and bare aluminium produce different marking results, so the process must match the surface stack.
What should you inspect after a production marking batch?
Check logo position, dimensions, orientation, contrast or depth, surface cleanliness, coating damage and consistency across the batch.
What should you send an aluminium bottle branding manufacturer in Noida?
Send the bottles or exact specifications, approved vector artwork, logo dimensions, orientation, finish target, quantity, tolerances and inspection requirements.
Keywords